Friday, May 29, 2015

Practical Graduation Gifts

My friend wanted me to personalize the lids to these Sterlite boxes she was going to fill with things for college for her niece and nephew...I think they turned out well!


The niece's monogram was painted on top of all in deep fuscia and will post that picture later!

Congratulations to all the graduates out there!


Graduation Decoration

I did a little decorating for my friend while she was busy decorating and organizing her son's big after graduation party for 500 kids!  I started at the nursery to get pinks and purples for her flower pots at the front door and the deck planters.


 Here's the front door planters...


and the deck planters...so happy!  I love all the texture and colors.


We kept things simple with graduation portraits.  He's one of my all time favorite kids...has the biggest heart, loves to have fun and is known far and wide for his Go-Pro and Selfie Stick.  He takes selfies with groups ('cause he's not vain...he just likes to capture the fun on film, er...digital files, that is.)  There's a selfie that he took at a football game with the the principal and student body behind him and one with the family on the beach right behind the goodies!


After his graduation, his parents were up all night working graduation after party and then came home to pack up the family to leave for vacation the next day...so, we kept it simple...paper and plastic, easy throw away stuff!


I made little pennants with the names of all the schools he had attended (pre-k to college) and tucked them in the flowers.


I hung Go-Pro selfies from his senior year and many travels on the china cabinet (waiting for crown and doors to be installed!) glass panes...


 and hung a simple pennant banner congratulating Mr. Go-Pro!


 Lastly, I made a goodie bag for the family to take to the graduation with champagne poppers and large head fans to wave at him when he crossed his tassel!  Congratulations Go-Pro Guy!


Monday, May 25, 2015

Pillow-Palooza!

I love making simple pillows and have been making a lot of them lately for clients!  Envelope backs, invisible zippers and flanged edges are about as exciting as they come, but there is always a sense of satisfaction in finishing them off and inserting the form in them, plumping them up and placing them in their new home!


 I love shopping for fabrics and aren't these wonderful?!


Monday, May 18, 2015

30 Minutes in My Cousin's Garden

My cousin has exquisite taste and a visit to her lovely home is always a real treat and especially her garden.  It is long and narrow and I think its my favorite place to be!  I gave myself 30 minutes with my paint kit to paint the fountain...


and this is what I got!  Certainly not enough time to get it where I wanted it to be, but enough to make it recognizable.  Can't wait to go back and pick another subject out there in the prettiest little courtyard!


Queenie’s 2015 Summer Craft Camps!

Summer 2105 Flyer

Can’t wait!  All kinds of fun things to do for all kinds of kids! 

Thursday, May 14, 2015

Re-Upholstered Cushions!

My friend used the heck out of these cushions a few years back and they have been in storage for the past 2 years waiting for their new home.  Yes, lots of love and use, and kids and pets with grime and spills!  Time for some new fabric, a coat of fresh paint on the wonderful rattan chairs and a new home to live in!  It's not too difficult to recover the seats...just a good dose of patience and a little elbow grease!  

The client's cushions before...

What you will need:
fabric (I used linen)
sewing machine/zipper foot and matching thread
hammer
scissors
flat head screwdriver
needle nose pliers
staple gun with 1/4" staples or longer depending on fabric thickness
pen or marking chalk
strong magnet-to help you clean up stray staples

optional:  cording, foam padding, batting fabric 
(it depends on whether the original is in study condition)


Deconstruction:
Carefully remove old cording and fabric from cushion...it's gonna take some elbow grease and patience! Flip the seat cushion over and start on a corner with your fingers.  Take care with all of those sharp staples...some seats had hundreds!


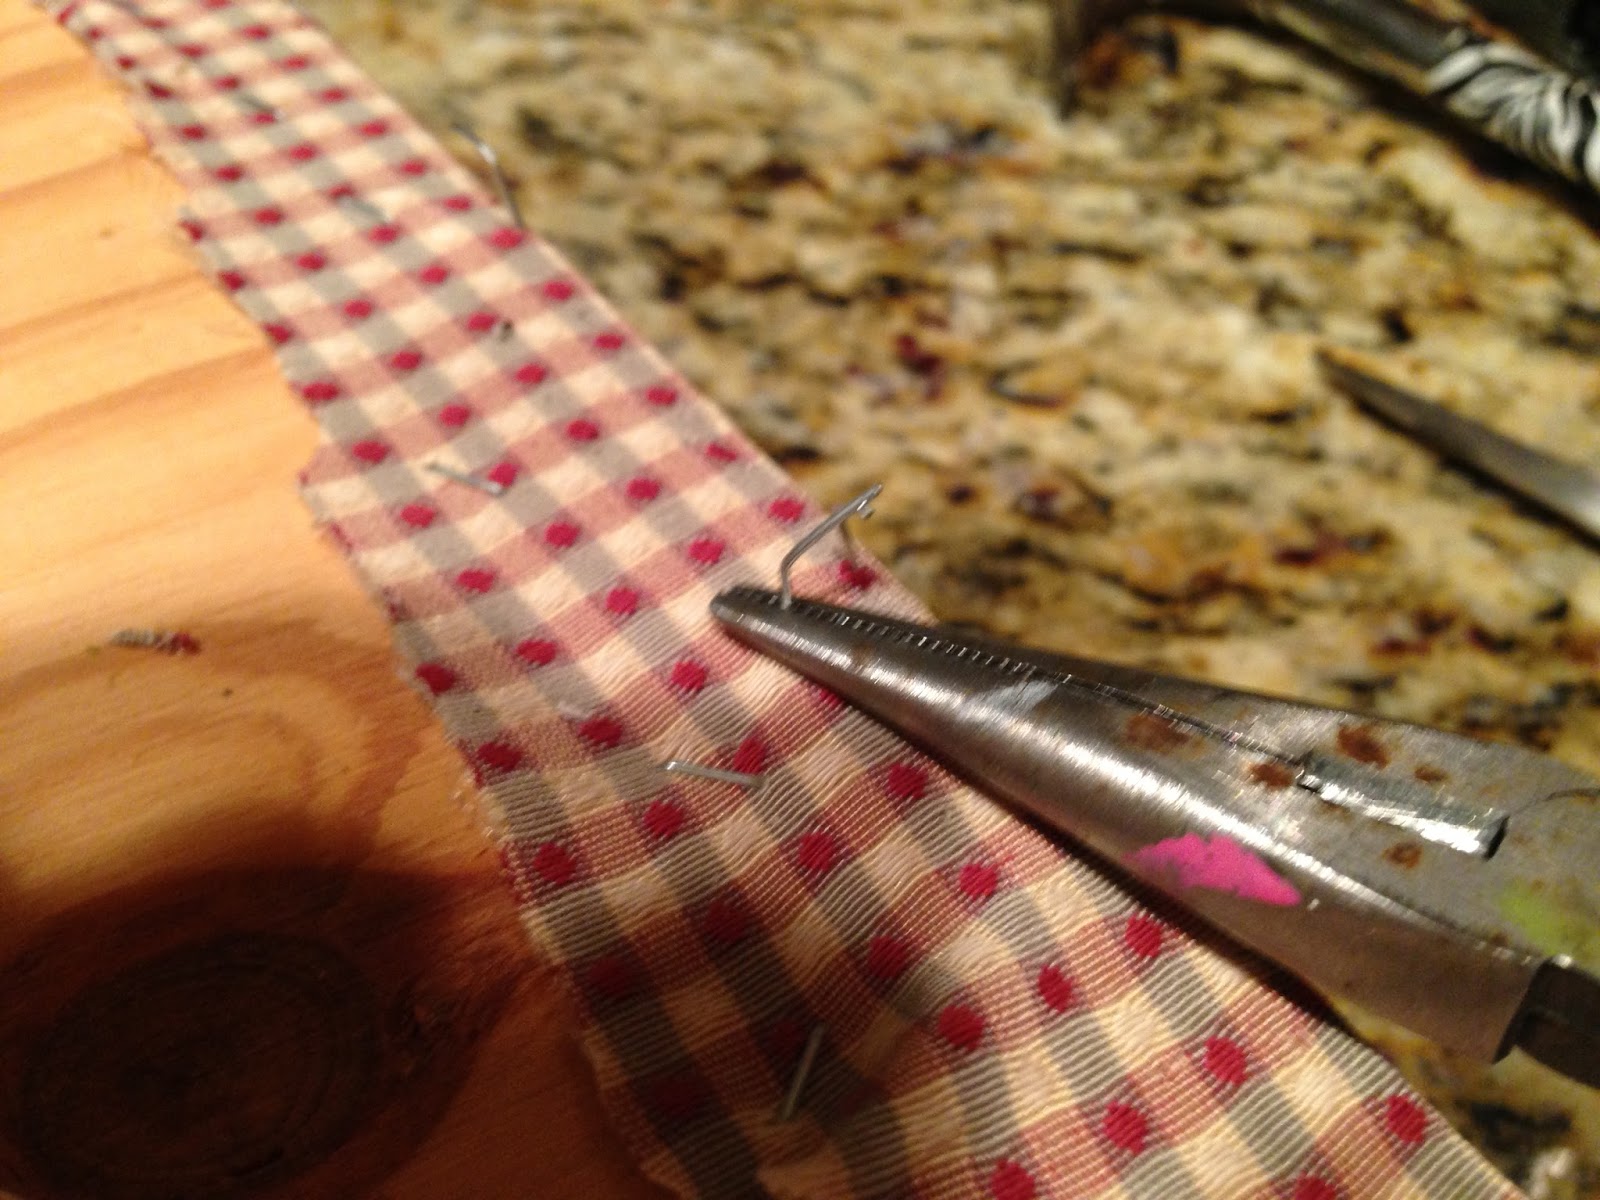
You will need to give it a good tug to loosen it up...I had to resort to putting the cushions on the floor, using my foot to apply pressure, and use the pliers to pull the fabric and staples out of the wood.
If you have to resort to this method, it helps to swear a lot and be careful not to break the wood form with your body weight!


You will probably have to come back in with your flat head screw driver to pry up staples and then your pliers to rip them out.  There goes the manicure!

Condition:
Now at this point, you need to inspect your batting, foam and cording materials to see if they are in good enough condition to re-use or do you need to purchase new items.  Mine were all in good shape, so I gently ripped the seam to the cording to expose enough of it to pull out of is casing with the pliers.  


Cutting Fabric:
Lay out the old fabric on top of the new fabric and be sure to get the features of a large pattern that you want centered on the seat if that applies. Trace the shape with chalk or pencil/pen and cut out.  I was recovering 4 seats, so I laid out the fabric on the floor.  You should have enough fabric to cover the seat plus 2-3" to come around the sides to staple onto form.  You will also need extra fabric (in this case, 1/2 yard) to cut bias strips to sew together to make cording.  Here's a good tutorial.


Staple Time:
Place the fabric on the seat and position.  Gently turn seat over and shoot staples in wood and fabric about an inch from the edge of the seat.  I start in the middle and pop one in every inch and a half or so in either direction from the center.  You will want to stop about 4" from the corners on this side and start on the opposite side of the seat, gently pulling the fabric taut for a neat fit.  Staple in either direction from the middle point and about 4" from corners.  Repeat this on last remaining sides...upholstery is a give and take of constantly pulling fabric to lie properly.  

You will also have staples that don't dig flush into the wood...jiggle them and pull them out if loose. If  they feel tight, use your hammer till flush with wood. Be patient... here's how it should look.


Corners:
You will want to trim off the extra fabric from the corners to make this job easier...I forgot to take pictures of this so check this tutorial for help.  Corners can be tricky, so take a deep breath and play with the fabric.  I like a double pleat on the corners as below.


Cording: 
Lastly, add the cording for a finished look.  Staple it as close to the sew line on the edge of the wood base as you can. 


Here's the finished product!  My friend spray painted the chairs this deep brown and they feel new again despite being over 40 years old!  I think they look wonderful!


Thursday, May 7, 2015

Teacher Appreciation Week...Breakfast to Go!

Our school has an amazing group of teachers!  I am a PTO officer and this year we wanted to do something different for our teachers during Teacher Appreciation Week during the first week of May.  One of our teachers sat with us and discussed what has been done in the past (lots of hurried home cooked lunches, little daily gifts, etc. that are WONDERFUL and always appreciated) and so we aimed for a different pace this year.  

We decided to surprise them with a breakfast to go box to get their day started.  We set up in the teacher's lounge and offered a coffee bar, handed them their boxed breakfast and told the teachers that there would be a daily drawing for prizes that included gift cards for car washes, manicures and pedicures, coffee shops, Best Buy, Staples, etc., large baked items likes cakes, pies, etc. to take home to the family, big ferns and potted plants, note-cards and I painted a few door hangers as well. 

We had everything ready to go by 7:30am...which meant we were up early putting it all together!  My dear friends and partners in crime met me at school bright and early with our 8th grade sons to do all the heavy lifting!


The coffee bar...not glamorous but exactly what they wanted!


One of our teachers posted this picture on Facebook as a look-see and thank you.  The breakfast box included a warm ham, cheese and spinach fritatta in a striped box, fruit bowl, muffins, juice and a mid-morning cookie snack.  Several student organizations gave the teachers daily useful items like school supplies, treats and a pencil shaped door hanger with their names.

We received several hand written thank you notes from grateful teachers a week later...always nice to get and especially before the craziness of the end of the year tests, exams and projects they will be working on!  Teachers have the best careers for little compensation for their countless hours and they make lifetime impressions on our kids...here's to you with our thanks!


Monday, May 4, 2015

More Daily Dodles

While I chaperoned my son’s Quiz Bowl Team at the day long tournament recently, I brought along my paint kit to help me while away the many hours you sit and listen to questions being asked an answered.  It was held at Subiaco Academy, a wonderful Benedictine Catholic Boy’s Boarding School not too far from where we live.  The classrooms are very plain and aside from the crucifix on each classroom wall, the only other adornment was the striped blue and orange ties their students wear.   So, I just started sketching common things that were in the rooms.  Here’s what I came up
 with…

You can tell I was getting bored and started day dreaming of working in my garden rather than chaperoning, then I could come inside and watch the Kentucky Derby!

It was all worth the wait as my son’s team won the tournament!

Saturday, May 2, 2015

Quiz Bowl Conquerors!

Our youngest is on the Quiz Bowl Team and they do a pretty good job of shaming the parents in the audience with their knowledge and wit.  I recently chaperoned the teams to our Catholic Diocesan competition...well worth the 8 hours we were gone because his team won the entire tournament! 


 Big brains unite!  The competition was held at Subiaco Academy this year.  

His school's Quiz Bowl Team has quite a history for excellence in competition and have won state and national first place titles for years!  This record comes from their very dedicated coach and sponsor, Mrs. Tia Marsh.  We're all headed for the nationals in Chicago in a few weeks.  

And just like Little League Baseball, the best part of the game is the treat you get afterwards!  We terrorized the poor staff at the Paris, Arkansas Sonic for a drive home treat for the drive home!  Hail to the victors!